Repair your neoprene wetsuit with Melco
How to easily repair and reinforce your neoprene wetsuit with Melco
A first tear or scuff mark on your brand-new wetsuit… Ouch, that hurts! The good news is that it isn't serious and can be repaired, but if you don't address it quickly, it could be the first step toward greater damage. It is best to repair your wetsuit as soon as possible. Be warned, this happens fast! As soon as the outer fabric of the wetsuit tears, use, water, and sun accelerate wear and tear, and a large hole appears in no time. So don't wait any longer.
We always emphasize how important it is to properly maintain and repair your wetsuit, and to take immediate action as soon as you discover damage, no matter how small: scuff marks, small holes, worn seams… We will show you how to quickly and easily repair these minor damages to your wetsuit with Melco.
What is Melco and how does it help you repair your neoprene wetsuit?
Melco is an elastic, wear-resistant fabric, designed and manufactured in Japan, for repairing and reinforcing neoprene products laminated with textiles (nylon, polyester, etc.). The surface, reinforced with polyacrylic dots, is extremely wear-resistant.
How do you easily repair and reinforce your neoprene wetsuit with Melco?
It is an all-in-one product that requires no additives or supplements, as it contains a hot melt adhesive that ensures a strong and secure bond. You can therefore apply it directly to the surface to be reinforced or repaired. Moreover, it respects the elastic recovery properties of neoprene, as it is specifically designed for this use.
How do you easily repair and reinforce your neoprene wetsuit with Melco by adding protective padding?
It is the perfect solution for applying to worn areas and protecting against cuts and holes. It is also ideal for protecting friction-prone areas, such as knees, elbows, seat, gloves, booties, etc. With Melco, you make your own protectors to prevent wear and tear on your wetsuit. Application is very simple using an iron, resulting in a professional, flexible, and durable finish.
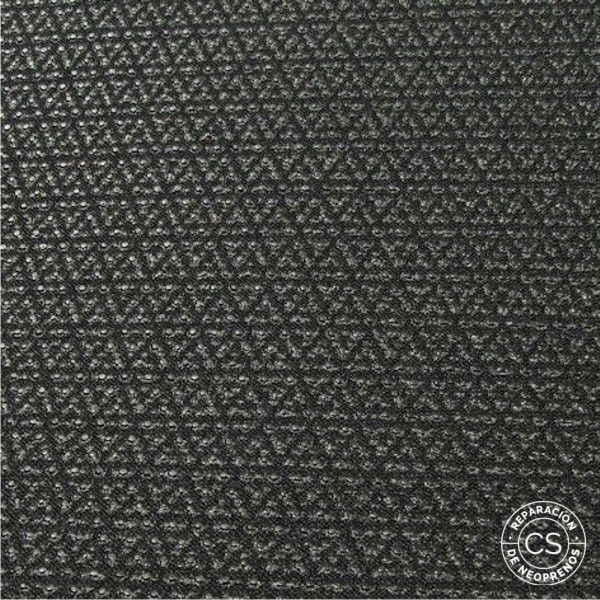
Melco anti-slijtagepatch voor neopreen – 30×50 cm
HOW TO REPAIR YOUR NEOPRENE WITH MELCO:
STEP 1: CLEAN THE NEOPRENE
- The key to a successful Melco repair is that your wetsuit is thoroughly clean and dry: rinsed with water after use, free of mud, salt, sand, etc., and completely dry. If that is not the case, you know what to do first: put it in the water!
- Rinsing well is usually sufficient, but using a neoprene cleaner like Wetsuitcare ensures a perfect result.
- A Wetsuitcare neoprene cleaner.
STEP 2: CUT OUT THE MELCO PIECE
Let's get started! ;)) You will need paper, a pen, scissors, and Melco abrasion-resistant technical textile.
You can cut the Melco textile directly, but we recommend using a paper template first. This ensures a neat repair and that the Melco piece perfectly covers the area to be repaired or protected. How to easily repair and reinforce your neoprene wetsuit with Melco by adding extra protection
TIP: For a good repair, the piece you apply must be larger than the damaged area so that it adheres to the intact neoprene beyond the damaged spot.
Once you have drawn the required piece, use the template to trace it onto the adhesive side of the Melco fabric with a pen. Once the fabric has been traced, all you have to do is cut along the line.
IMPORTANT TIP: Melco fabric shrinks slightly when ironed, leaving a thin layer of melted glue around it. We recommend removing the pen line while cutting to prevent it from transferring onto the neoprene along with the glue. Otherwise, the ink will be visible and look unsightly, especially on light-colored neoprene.
STEP 3: IRON THE MELCO PIECE
The final step to repair your neoprene with Melco! For this, you need an iron and a cotton cloth. The cotton cloth is ESSENTIAL to prevent the heat from damaging the outer fabric of your neoprene.
Depending on the damage, it may be necessary to pre-treat the area with liquid neoprene glue: to repair a tear, fill a small hole, etc.
Lay the area to be repaired flat on a sturdy surface and heat the iron to 150°C. This is usually the temperature for ironing cotton (check your iron's instructions). Melco hot melt glue melts when you iron it for 20 seconds at 140-160°C (approximately).
IMPORTANT: the order is as follows: neoprene, Melco piece, cotton cloth, and iron.
How to easily repair and reinforce your neoprene with Melco iron-on protection
Start ironing with the steam function turned off, and be careful not to shift the Melco patch. Tap the iron in several places to secure the patch before fully ironing it. Lift the cloth to check if everything is in place.
Once the Melco patch is partially attached, you can iron normally, without risk of shifting, ALWAYS with the cotton cloth over the neoprene to prevent the outer fabric from burning. We recommend ironing for a few seconds at a time to check how the adhesive hardens. It is best to proceed gradually for optimal results.
A question you might have when applying Melco patches is how to tell if they are properly attached. When you see a very thin, shiny edge appear around the Melco patch—this is the melted adhesive—you can assume that the application is complete.
How to easily repair and reinforce your neoprene with Melco adhesive cord. See the EXPRESS Neoprene Repair Kit.
TIP: Allow the cord to cool completely before moving the neoprene so that the glue can cure.
VERY IMPORTANT: ALWAYS place a cotton cloth between the iron and the neoprene to prevent damage to the outer fabric of your suit. THIS IS ESSENTIAL!
Now you know how to quickly and easily repair minor damage to your wetsuit, such as scuffs, cuts, or small holes, so that they no longer stand in the way of premature wear. Just like you, we want your wetsuit to last a long time so that you can enjoy it to the fullest during your favorite activities. Long live your wetsuit!
Based on an article by www.reparaciondeneoprenos.es
Overview Canyoning knowledge base: Go back.
CanyonZone
-
- Experts in canyoning & caving gear - ship worldwide
-
- Rent outdoor equipment
- New items in assortment
- Special offers
- Pre-ordering 2026
- NEW - Petzl Canyoning / Caving Line 2026
- 2nd hand canyoning caving articles
- Items / packages customer specific
- Giftcards of CanyonZone
-
- Canyoning (basic) equipment
- Canyoning equipment packages
- Luggage / Travel Bags
- Canyoning Neoprene clothing
- Canyoning shoes
- Harnesses & Accessories
- Helmets outdoor sports
- Carabiners & maillons
- Descend devices
- Ascending / Rise along rope
- Pulleys
- Rope & webbing slings
- Anchoring & accessories
- Via Ferrata / Klettersteig sets
- Outdoor Gloves / (ice-)canyoning, caving, via ferrata
- Canyoning Back Packs, bags & duffels
- Drybags & Kegs, Boats
- Outdoor Knives & Scissors
- Safety in outdoor sports
- First Aid / Medical Articles
- Rescue in outdoor sports
- Camping, Bivouac & Backpacking
- Winter- / Ice Canyoning
-
Canyoning Books & Topographic Maps
- Map Pouch
-
Canyoning Guide Books
- Australia
- Austria
- France (including Corsica and La Reunion)
- Germany
- Greece (including Crete) / Balkans
- Israel
- Italy (including Sardinia)
- Jordan / Middle East
- Morocco
- New Zealand & Australia
- Portugal (including Madeira and Azores)
- Romania
- Scandinavia
- Slovenia
- Spain (including Canary Islands and Majorca)
- United Kingdom (UK) / Scotland
- United States of America
- South America
- Switzerland
- Turkey
- Canyoning Techniques & Skills
- Canyoning Maps
- Outdoor Children's Books
- Outdoor DVDs
- Via Ferrata / Klettersteig books
- Repair & Maintenance
- Miscellaneous items outdoor sports
-
- Especially for Ladies
- Especially for Children
- Especially for Instructors and Guides
- Especially for Outdoor Sports Companies
- Especially for Underwater / Cave diving / Diving
-
- Caving (basic) equipment
- Caving equipments packages
- Caving Suits / Overalls
- Caving Under Suits
- Caving Boots / Wellies
- Caving Socks
- Caving Knee- and Elbow Pads
- Caving Gloves
- Headlamps & torches
- Caving Bags & BackPacks
- Tents and Bivi bags
- Caving & Potholing Books and topographic maps
-
-
Climbing related gear: on request
-
- Services
-
- CanyonZone New(s)
- CanyonZone Customer Service
- Contact about Assortment
- Business ordering at CanyonZone
- About CanyonZone
- CanyonZone's FAQ
- CanyonZone's Knowledge Base
- About CanyonZone, owner Gertjan van Pelt
- Works together with
- Link exchange
-
- Privacy
- Terms and Conditions
-
Terms and Conditions Rental
-